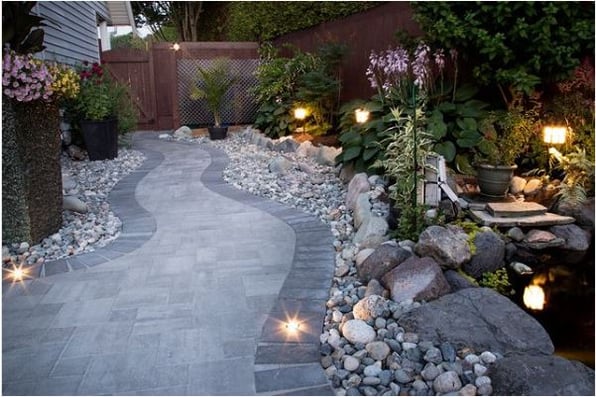
If you're looking to enhance the beauty of your landscape at night, installing landscape lighting is a great way to achieve this goal. Landscape lighting not only adds curb appeal but also improves safety and security around your property. In this article, we'll take you through the steps needed to install low-voltage landscape lighting.
With the right preparation and information, DIY landscape lighting can be a fulfilling and cost-effective project to enhance the aesthetic and functional aspects of your home's outdoor spaces. Whether you're looking to highlight specific features in your garden, create a cozy ambiance for outdoor gatherings, or improve the safety and security of your property, landscape lighting can offer numerous benefits. However, planning and executing the project correctly is important to avoid common pitfalls and ensure optimal results. This guide will provide the essential tips and insights to help you confidently embark on your DIY landscape lighting project.
Materials and Tools Needed:
- Low-voltage light fixtures
- Low voltage transformer sized to the number of lights being installed
- 12/2 direct burial wire
- Waterproof wire connectors
- Wire strippers
- Shovel or trenching tool
- Screwdriver (optional for adjustable lights)
- Drill (optional for mounting lights to walls)
Step 1 - Mark Buried Wires and Pipes
Before embarking on the installation of low-voltage landscape lighting, it is important to mark any existing cable or irrigation lines physically. This will prevent them from being damaged during the process. You should also determine which outdoor outlet will be used to connect your transformer.
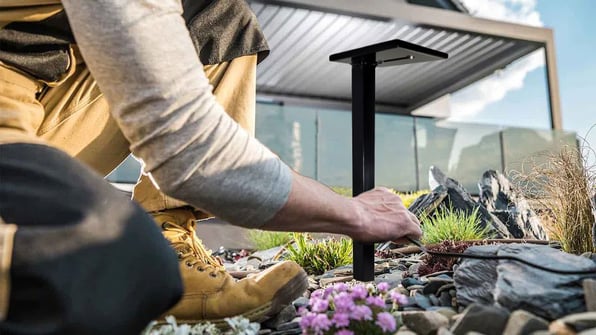
Step 2 - Unpack and Assemble Your Lights
Let's move on to unpacking and assembling your landscape lighting fixtures. Take everything out of its box and get ready to mount them. There are several ways to mount the fixtures, but we'll focus on the three most common methods:
- The first is stake mounting, where a stake is attached to the fixture and placed directly into the ground.
- The second is surface mounting, which is used when a fixture must be attached to a hard surface and usually requires a power drill.
- Finally, there's in-ground mounting, where a fixture is mounted directly into the earth. Having a spade, shovel, or post-hole digger is a big help with this one.
Step 3 - Clear a Path for Your Wire Runs
It's time to clear a path for your wire runs and place your fixtures based on the project map you created during planning. This is where things get interesting. You'll want to place your light fixtures in the locations according to your plan, but don't worry if you need to make some adjustments later. To start, layout the main run wire from your transformer location along your planned path. Be sure to leave 6 feet of slack at the transformer for connection and about 18 inches of slack wire around each light fixture to allow for placement adjustments.
Step 4 - Install Your Transformer
Mount your low-voltage transformer. This is a crucial step, so pay attention. When choosing a location for your transformer, you'll want to keep a few things in mind. First, transformers must have 1 foot of clearance in every direction. Second, they should be at least 30 feet away from water features. Finally, they must be on a surface that can withstand the heat it produces. We highly recommend mounting your transformer on a wooden pressure-treated post near the outlet location. This will give you the most flexibility in locating the transformer and avoid placing screws in your home's siding. Once you've chosen a location, connect your transformer to your main run(s) wire by pulling the ends apart about 6 inches down, then strip 1/2 – 3/4 inch of the ends. Place one strand of wire in the com terminal and the other in a terminal marked either 12 volts or 15 volts. The 12-volt tap is for shorter wire runs with fewer fixtures, while the 15-volt tap is for longer runs that draw more power. Wire exiting the transformer should be protected with a conduit until it reaches the ground.
Step 5 - Connect Your Lights
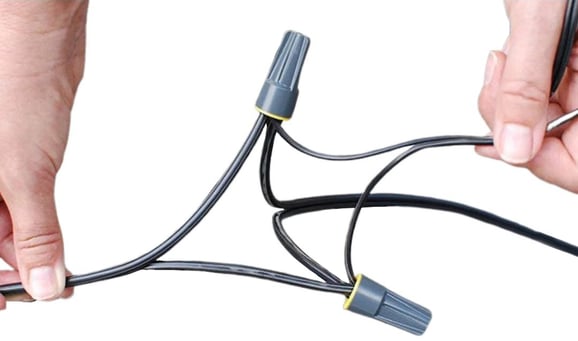
The final step is to connect your fixtures by splicing their lead wires to your main runs. This can be a bit tricky, but we have faith in you. First, cut the main run wire at the point where you want to connect the wire lead from the light fixture. Pull the ends apart about 6 inches down, then strip 1/2 – 3/4 inch of the ends. Now you should have 6 "ends." Take one end from the three wires and twist the copper wire together. Make sure to twist the wire in the same direction as you will twist on the connector. For most people, that is clockwise.
.jpg?width=1080&height=1080&name=Untitled%20design%20(3).jpg)
Repeat with the other three wires with another connector. Use a waterproof twist connector for each wire group and insert the twisted wire end into the cap and twist clockwise until the wire begins to spin with the cap. Silicone may leak out of the connectors; this is normal - this is what seals the wires against the weather.
If you need to branch off your main line to go another direction, you can attach the branch-off wire the same way as if you were connecting a lead wire from an individual lamp.
Step 6 - Test All Your Lights
You can test your system once all your connections are made. Turn on your transformer and walk around your property to ensure every fixture is lit. If one is out, you may have a bad connection to your system.
Step 7 - Adjust Light Positions for Best Results
If all your fixtures are correctly functioning, you can now begin the adjustment phase of your installation. Wait until nighttime before starting the adjustment; that way, you can see the lighting effects created by each fixture. Now walk your property again and ensure each light is aimed at the desired feature in your landscape.
You'll also want to watch for glare from spotlights. Glare can be remedied by adjusting the fixture's angle or its glare guard's position.
Step 8 - Dig Trenches and Bury Wires
Layout and dig your trenches for your wire runs. The exact depth of the trenches is determined by your local codes, but low-voltage cable is typically buried at least 6 inches deep. Most people use a shovel or spade for trenching, but more specialized tools are also available.
Step 9 - Automate Your Transformer
Congratulations, you're almost there! All that's left is to bury those pesky wires and program your transformer if you're using a timer or smart outlet. With a little bit of know-how, you're on your way to a stunning landscape lighting setup that will make your neighbours green with envy!
In conclusion, DIY landscape lighting can add a unique touch to your home's outdoor spaces while improving their functionality. With the right tools, preparation, and information, anyone can undertake this project and achieve great results. So, if you're looking for a way to enhance your home's curb appeal and make the most out of your outdoor spaces, give DIY landscape lighting a try!
FAQ
Q: What is low-voltage landscape lighting?
A: Low-voltage landscape lighting is a type of outdoor lighting that operates on a voltage of 12 volts or less, making it safe for outdoor use.
Q: Is landscape lighting installation a difficult task?
A: It can be a bit challenging, especially if you're not comfortable working with electrical wires. However, if you follow the instructions carefully and take your time, you should be able to complete the installation successfully.
Q: What tools do I need to install landscape lighting?
A: You will need wire strippers, a shovel or trenching tool, and possibly a power drill if you're using surface mounting.
Q: Can I install landscape lighting myself or should I hire a professional?
A: It depends on your level of comfort with working with electrical wires and tools. If you're not comfortable doing it yourself, it's always a good idea to hire a professional to ensure the installation is done correctly and safely.
Q: What type of transformer should I use for my landscape lighting?
A: You should use a low-voltage transformer designed specifically for outdoor use. Make sure to choose a transformer that is appropriate for the size of your lighting project.
Q: How deep should I bury the wires for my landscape lighting?
A: The exact depth of the trenches is determined by your local codes, but low-voltage cable is typically buried at least 6 inches deep.
Q: Can I adjust the angle of spotlights after installation?
A: Yes, you can adjust the angle of spotlights to achieve the desired lighting effect. It's recommended to do this at night to get a better idea of how the lighting looks.
Q: How do I troubleshoot if one of my landscape lighting fixtures isn't working?
A: First, check to make sure all connections are secure and wires are properly spliced. If that doesn't fix the issue, you may need to replace the bulb or the fixture itself.
Q: Can I add more fixtures to my landscape lighting system after installation?
A: Yes, you can add more fixtures to your system as long as your transformer can handle the additional load. Just make sure to follow the same steps for installation and wire connection.
.jpg)