6 min read
The Ultimate Guide to Designing an Effective Landscape Lighting Plan for Your Home
Posted by The Illuminator
With the right preparation and information, DIY landscape lighting can be a fulfilling and exciting project to undertake. Not only does it enhance the visual appeal of your home's outdoor spaces, but it also increases the usability of your property by providing lighting for nighttime activities. However, before diving into the project, it's important to create a landscape design plan that ensures the installation goes smoothly and you achieve your desired results.
A well-designed plan takes into account the property's dimensions, existing landscape features, and the type of lights that will be used, as well as their placement. By following a well-thought-out plan, you can create an impressive landscape lighting design that showcases your property and improves its safety and functionality.
Step 1 - Evaluate Your Property
Before you start buying lights and planning where to put them, take a walk around your property at night and assess your lighting needs. Look for dark areas that could benefit from additional light, such as walkways, steps, and entryways. Think about the mood you want to create, and whether you want to highlight specific areas or create a general ambience.
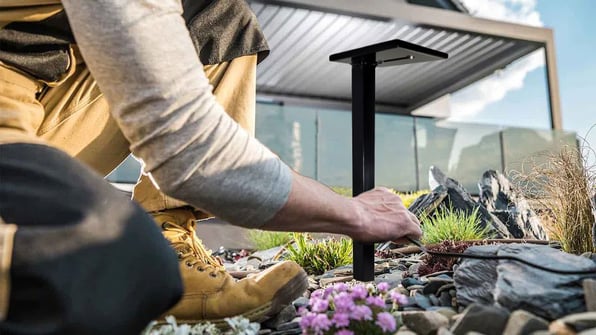
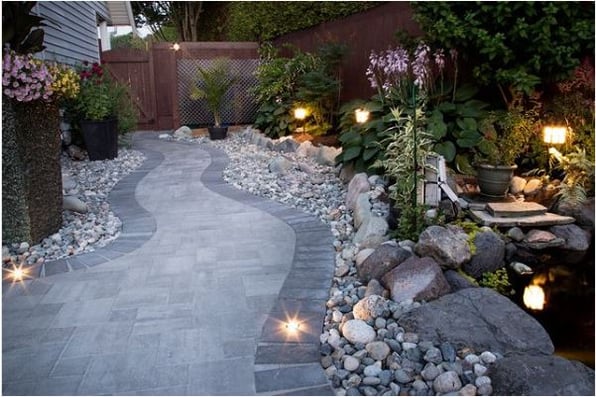
Think about the type of light you want to use in each area of your property. Path lights are ideal for illuminating walkways and stairs, while spotlights are perfect for highlighting trees, fountains, or other architectural features. Floodlights are great for illuminating large areas, such as patios or decks, while well lights can be used to illuminate low-lying foliage or ground cover.
Consider whether you want to create different moods in different parts of your property. For example, you may want to create a more romantic and intimate atmosphere near a garden bench, while a brighter and more vibrant mood may be appropriate for a patio or outdoor entertaining area. Using a combination of different lights can help you achieve the desired effect and create a cohesive design throughout your property.
Finally, don't forget to account for any existing landscape features, such as trees, bushes, or flower beds, that you want to highlight or complement with your lighting design. With careful planning and attention to detail, you can create a stunning landscape lighting plan that enhances the beauty of your property while increasing safety and security.
Step 2: Gather Information
Before you start designing your landscape lighting plan, you need to gather information about your property and the types of lighting available. Here are some important factors to consider:
- Determine power sources: Consider the availability of power sources on your property. Do you have an outdoor electrical outlet or do you need to install one?
- Choose lighting types: There are several types of lighting to choose from, including path lights, spotlights, floodlights, and deck lights.
- Consider the purpose of each area and choose the type of lighting that best fits your needs.
- Consider energy efficiency: Look for energy-efficient lighting options, such as LED lights, to save on energy costs and reduce your carbon footprint.
- Set a budget: Determine your budget for the project, including the cost of lighting fixtures, wiring, and installation. Keep in mind that professional installation may be necessary for more complex lighting plans.
By gathering this information, you can make informed decisions about your landscape lighting plan and ensure that it meets your goals and budget. Taking the time to gather information upfront will help you to create a well-planned lighting design that enhances the beauty and safety of your property.
Step 3 - Design Your Plan
Designing a landscape lighting plan for your home involves creating a visual map of your property that outlines the placement and type of lights you plan to use. This will help you to achieve a cohesive and effective lighting design that highlights the beauty of your property while increasing safety and security. Here's how to draw a plan and what elements should be included:
Measure your property:
The first step in creating a lighting plan is to measure your property's dimensions. Use a measuring tape to measure the length and width of your property, and note any existing landscape features such as trees, bushes, or flower beds.
Draw a scale map:
Next, draw a scale map of your property on graph paper, using a scale of 1 inch to 10 feet. This will help you to plot the placement of your lights accurately.
Mark important features:
Mark any important features of your property on the map, such as paths, stairs, entryways, trees, and other landscape features. Note any areas that need additional lighting for safety purposes, such as dark pathways or steps.
Select light types:
Decide which types of lights you want to use for each area of your property. Use different symbols or colours to represent each type of light on your map. For example, use a circle to represent path lights, and a triangle to represent spotlights.
Determine light placement:
Based on the type of light you want to use, determine the placement of each light on your map. Consider the height of the light, the direction of the light, and any potential obstructions that may affect the light's effectiveness.
Plan wiring and transformer placement:
Plan the placement of your wiring and transformer on your map. Keep in mind that wires should be buried at least 6 inches deep to prevent damage from lawn equipment or digging.
.jpg?width=1000&height=550&name=ezgif.com-webp-to-jpg%20(1).jpg)
Elements to include in your lighting plan:
-
Property dimensions
-
Landscape features
-
Pathways and stairs
-
Entryways
-
Trees and foliage
-
Light types and placement
-
Wiring and transformer placement
Adjust the plan:
Once you have created a preliminary lighting plan, walk around your property at night to test the placement of your lights. Make any necessary adjustments to your plan to ensure that it achieves the desired effect.
With the right preparation and information, you can create a landscape design plan that meets your goals, fits your budget, and ensures a smooth installation process. By following the steps outlined in this guide, you can achieve a stunning and functional landscape lighting design that showcases your property and improves its safety and functionality.
FAQ
Q: Why should I create a landscape lighting plan?
A: Creating a landscape lighting plan can help you achieve your goals for your outdoor spaces, whether that's improving safety and security, highlighting landscape features, or extending the usability of your outdoor living areas. By planning your lighting design ahead of time, you can ensure that you choose the right types of fixtures, place them in the optimal locations, and create a cohesive and functional lighting scheme.
Q: What type of lighting should I use for my landscape design?
A: The type of lighting you choose will depend on your specific goals and the features of your landscape. Pathway lights are great for illuminating walkways and creating a welcoming atmosphere, while spotlights and floodlights can be used to highlight landscape features such as trees, water features, and architectural elements. Deck lights are ideal for creating a relaxing outdoor living space, while security lights can help keep your property safe. Consider the function of each area and choose the type of lighting that best fits your needs.
Q: How do I determine the right placement for my lighting fixtures?
A: The placement of your lighting fixtures will depend on the specific features of your landscape and your goals for your lighting plan. Some factors to consider include the height and position of trees and other landscape elements, the locations of electrical outlets or solar panels, and the functional purpose of each area. A good rule of thumb is to use a combination of overhead, ground-level, and accent lighting to create depth and interest in your landscape.
Q: How many lighting fixtures do I need?
A: The number of lighting fixtures you'll need will depend on the size and layout of your outdoor spaces, as well as your goals for your lighting plan. Some areas, such as walkways and stairs, may require more fixtures for safety reasons, while other areas may need fewer fixtures to create a more subtle effect.

.jpg?width=596&name=ezgif.com-webp-to-jpg%20(2).jpg)

